
Pipelining Chef with Jenkins
06 Apr 2018 | ci/cd chef pipelineSummary
Today, I’m going to detail out how we are setting up our pipelining process for all things Chef for our business unit partners. This process uses a combination of Chef, Jenkins, GitHub, a custom Jenkins Shared Library, and some custom developed utilities.
Problem
There are a couple problems that started us down this path:
- We run a single Chef server/Chef org containing all of our systems.
- This means that we needed a way to allow users to execute changes against the Chef server without allowing knife access.
- This also means that without automation of some sort, someone from our team would have to execute any change required, making us a serious bottleneck.
- Knife has no safety net.
- It’s very easy to make simple mistakes that can cause massive problems.
- Chef Server/Knife doesn’t have granular RBAC so allowing knife would also allow users the ability to change objects that may not belong to them. We’re all adults and professionals and wouldn’t do anything maliciously to negatively affect another group; however, mistakes happen.
- Allowing multiple groups to make changes without a consistent process creates numerous problems by allowing variations. This makes performing upgrades and validation testing exponentially harder.
- Another problem is ensuring that global cookbooks and attributes are applied to all systems. OS level cookbooks that set basic settings for the environment and other things like audit cookbooks used by the internal security teams must be applied to everything to ensure a consistent experience and process.
Solution
I won’t lie to you, this is still very much a work in progress but this is still a significant step forward compared to manual processes.
Let’s look at the components used.
| Component | Purpose |
|---|---|
| Chef | CM Tool (I know… Obvious, right?) |
| Jenkins | Automation Server |
| GitHub | Source code repository |
| Shared Library | This library is essentially a standard Jenkins pipeline. We elected to use a shared library to simplify the process for when we needed to make changes. We change the library and all the repositories automatically execute the change the next time they are run. |
| Utilities | These utilities handle some of the file merging, interaction with the Chef server, and provide some of the safety nets. This project also contains the global_envs folder |
For deeper detail about each of these components, view their websites or project README’s.
Deployment Processes
Before we get into the setup, I think it’s good to provide some details about our methodology about object deployments. There are two main types of deployments for us:
- Global Deployments - cookbooks, environment version pins, audit profiles, etc. that are deploy by our Internal IT team.
- We use the
global_envsfolder to manage cookbook version pins per environment. This allows us to systematically roll out cookbook changes across the fleet. The environment file is only a section of a standard file. It only contains thecookbook_versions,default_attributes, andoverride_attributessections. There is a step in theJenkinsfilefor this project that handles updating the version pins for all the global changes.
- We use the
- BU Deployments - cookbooks, environment version pins, and data bags that the BU can manage.
- Cookbooks
- Each cookbook has a dedicated
Jenkinsfilewithin the root of the repository that reference thepromoteCookbook('env_name')method of the Shared library.
- Each cookbook has a dedicated
- Data bags
- All data bags (including chef-vault bags) are stored in the BU/environment repository. There should only be one environment repository per BU/env. This process follows the same pattern as ChefDK. Create the data bag locally just as you would except instead of using
knife data bag from file, the data bag folder is added to the repository and committed to GitHub.
- All data bags (including chef-vault bags) are stored in the BU/environment repository. There should only be one environment repository per BU/env. This process follows the same pattern as ChefDK. Create the data bag locally just as you would except instead of using
- Environment
- This is a standard Chef environment file. The automation utilities merge the matching environment file from the
global_envsfolder with the BU’senvironments/name.jsonfile. The pipeline then validates that all of the cookbooks and named versions exist on the Chef server then it uploads it.
- This is a standard Chef environment file. The automation utilities merge the matching environment file from the
- Profiles
- Each profile has a dedicated
Jenkinsfilewithin the root of the repository that reference theuploadProfile()method of the Shared library.
- Each profile has a dedicated
- Cookbooks
The astute reader will no doubt notice the distinct absence of information about run lists. This is a deliberate move. We decided that using the concept of role cookbooks was the best pattern for our company. When we onboard a new BU partner, we establish two role cookbooks.
- Environment cookbook - This cookbook is managed by our internal IT staff. It contains the required global cookbooks such as our audit profiles.
- BU Role cookbook - This cookbook is managed by the BU. They add additional cookbooks as needed to meet their needs. They use attributes and guards to control where the code is executed.
Setup
These steps assume you have a working Chef Server and a working Jenkins Server. If you are new to Chef, I suggest heading over to Learn Chef Rally and checking out some of the modules (I would recommend the Infrastructure Automation). If you are new to Jenkins, I would recommend checking out the official Jenkins documentation here: Installing Jenkins.
- Let’s set up the automation utilities first.
- Fork the utilities project

- Create a pipeline in Jenkins/BlueOcean
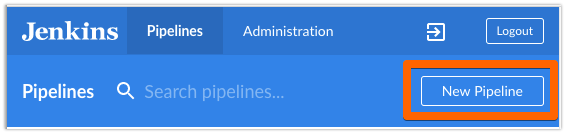
- Select GitHub (I’m sure this would work if the code was stored somewhere else, we just happen to use GitHub for our stuff.)

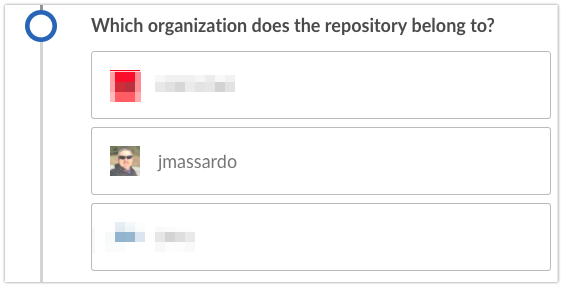
- Select the appropriate organization
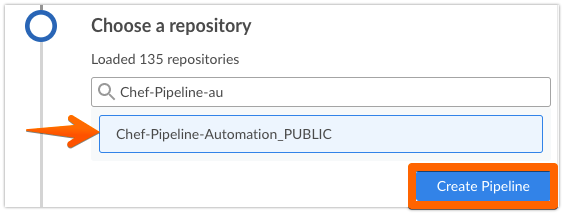
- Select the repository (In our case, we use the Chef-Pipeline-Automation repo.)
- Fork the utilities project
- Ok cool! Now we have our utilities available in the
/var/chef_automation/folder. - Next, let’s move on to the Shared Library.
- Fork the project
- Follow the steps outlined in the project’s README file.
- I will leave you with a couple notes:
- Any changes to your fork of the library’s project will be immediately available on the Jenkins server so be careful with any changes or enhancements that you make.
- This library is essentially a collection of pipelines so if a new function is needed, start by creating a regular Jenkinsfile in a test repo and work out the steps first, then create a new
verbNoun.groovyin the/vars/folder.
- Now that we have the Jenkins stuff set up, let’s set up the
chef-repo.- Install ChefDK on the Jenkins server
- Create a
chef_repofolder and place theknife.rband theuser.pemfiles in the Jenkins home directory
cd /var/lib/jenkins
mkdir -p chef_repo/.chef
cp /path/to/my/knife.rb /var/lib/jenkins/chef_repo/.chef/knife.rb
cp /path/to/my/user.pem /var/lib/jenkins/chef_repo/.chef/user.pem

tree /var/jenkins
chef_repo
├── .chef
│   ├── knife.rb
│   └── client.pem
Thanks for sticking with me thus far. I’m happy to tell you that all of the ground work is done and the next two steps are to set up the BU’s main repo and their first cookbook and profile repo.
- BU/Environment repository
- There needs to be one repository for each environment on the Chef Server.
-
The repository follows this structure:
env_repo ├── environments │ ├── env_name.json ├── data_bags │ ├── admin_users │ │ ├── admin1.json │ │ ├── admin2.json │ │ └── admin3.json │ ├── limited_users │ │ ├── user1.json │ │ ├── user2.json │ │ └── user3.json │ └── op_users │ ├── op1.json │ ├── op2.json │ └── op3.json ├── Jenkinsfile └── README.md- The
Jenkinsfilefor the environments repository should contain the following:
// Jenkinsfile @Library('chef_utilities') _ updateEnvironment('chef_env_name') - The
- Cookbook repositories
- Chef best practices says that each cookbook should be stored in its own repository so that’s how we’ll do it.
- Create cookbooks as normal
chef generate cookbook cookbooks/my_new_cookbook - Place a
Jenkinsfilein the root of the repository with the contents below:
// Jenkinsfile @Library('chef_utilities') _ promoteCookbook('chef_env_name')- Once the
Jenkinsfileis created, create a new pipeline in Jenkins for each cookbook. If the permissions are set correctly in Jenkins, this task can be delegated to the BU further reducing the necessity for outside intervention.
- Last but certainly not least, InSpec profiles. Profiles follow the standard processes just like cookbooks with the only difference being the function called in the
Jenkinsfile.
// Jenkinsfile
@Library('chef_utilities') _

uploadProfile()
That’s it. Easy peasy, right? I know it feels like a lot of information and a lot of moving pieces and to a certain degree, it is. However, taking the time to set up this type of pipelining greatly improves operational efficiency and drastically reduces the likelihood of a simple mistake breaking production.
Thank you for taking the time to read all of this information. The Automation Utilities and the Shared Library are both open source so feel free to contribute. If you do make enhancements or have questions, please drop me a email, hit me on Twitter, open an issue, or submit a PR on GitHub.